Homemade Reese’s Cups with Sea Salt
Highlighted under: Simple Baking Recipes
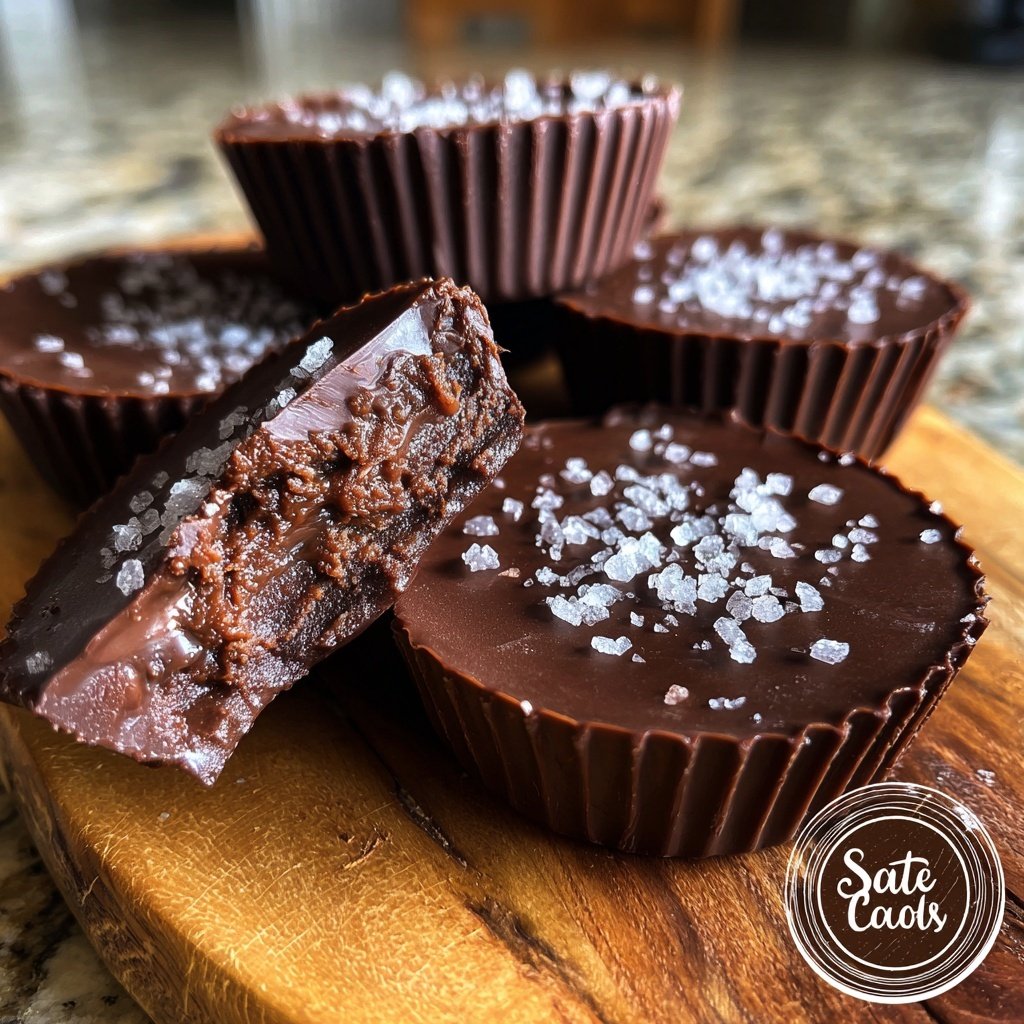
I absolutely love making my own Reese’s Cups at home, and adding a sprinkle of sea salt takes them to a whole new level. The rich chocolate and creamy peanut butter filling melt beautifully together, creating a treat that is not only indulgent but also satisfying. By controlling the ingredients, I can customize the sweetness and ensure the chocolate is just how I like it. Plus, I enjoy the simple process of layering flavors—each cup offers a delightful surprise that treats my taste buds with every bite!
When I first attempted to make my own Reese’s Cups, I was pleasantly surprised at how simple the process was. The balance of creamy peanut butter mixed with powdered sugar, paired with melting chocolate, creates a perfect filling. I found that letting the chocolate set slightly before adding the filling helps prevent it from melting too quickly.
One tip I discovered is not to skip the sea salt! The touch of salt enhances the richness and balances the sweetness perfectly, making each bite just that much more special. These cups disappear quickly, and everyone always asks for more!
What You'll Love About This Recipe
- Rich chocolate flavor paired with fresh sea salt
- Creamy peanut butter filling that is perfectly sweet
- Easily customizable for various dietary needs
The Importance of the Chocolate Blend
Using a combination of milk and semisweet chocolate chips is key to achieving the perfect balance of sweetness and richness in these homemade Reese's Cups. Milk chocolate contributes a creaminess that melts beautifully, while semisweet chocolate adds depth and a slight bitterness. This combination ensures that the final product isn't overly sweet, allowing the peanut butter filling to shine. If you're looking to adjust the sweetness, you could play with the ratios; just remember that too much semisweet can be overpowering.
It's also important to melt the chocolate slowly and evenly. Melting in 30-second intervals in the microwave prevents scorching, which can lead to a grainy texture. Stirring in between intervals helps maintain an even temperature and ensures the chocolate becomes perfectly glossy and smooth—a visual cue that it's ready for the next step. Alternatively, a double boiler can be used for those who prefer a stove method, allowing for more control over the heat.
Layering for Texture and Flavor
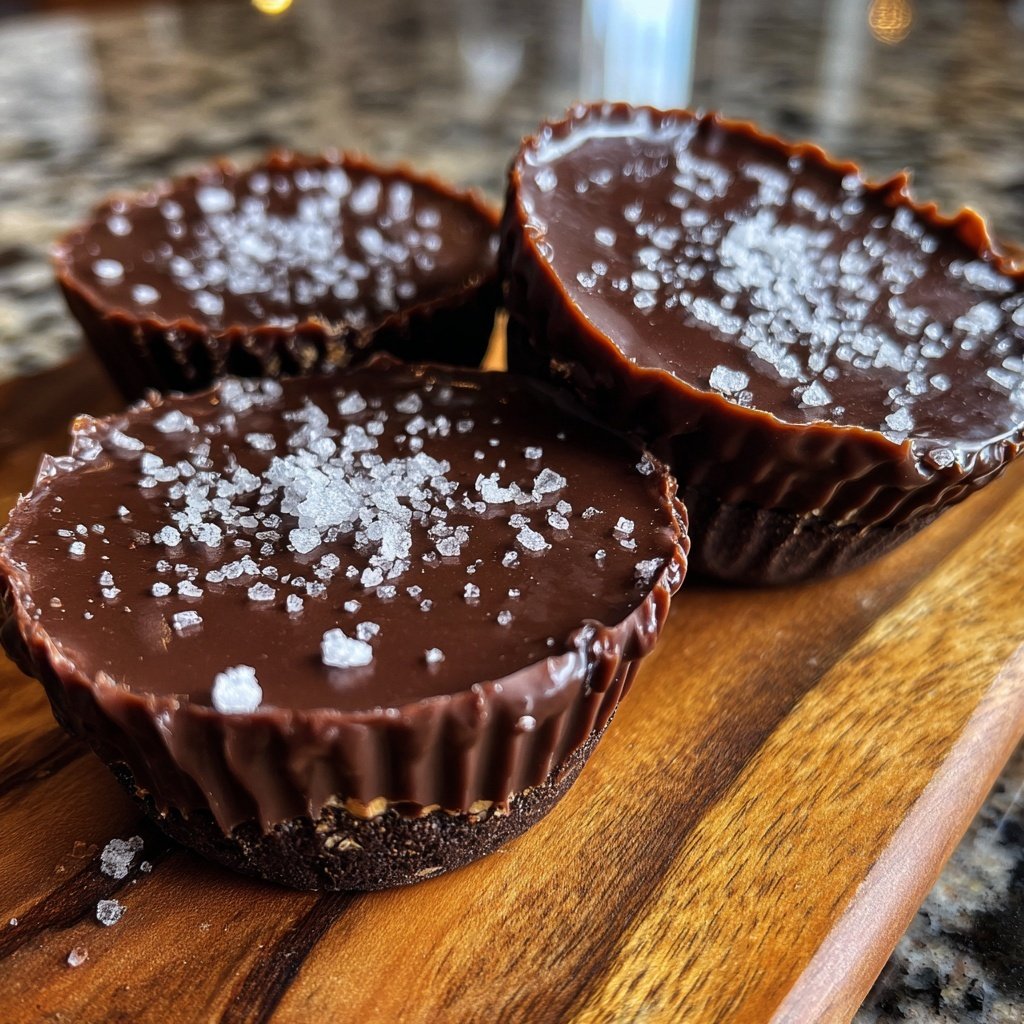
The layering technique not only enhances the visual appeal of your Reese's Cups but also creates a delightful contrast in texture. By pouring a thin layer of chocolate first, you ensure that the bottom of the cup is well-coated. This method also prevents the peanut butter filling from seeping into the chocolate, allowing each bite to maintain that perfect balance of crunchy and creamy. Allowing the chocolate to set for a few minutes is crucial; this quick cool-down lets the base become firm enough to hold the peanut butter without collapsing.
When adding the peanut butter filling, be generous but leave some space for the final chocolate layer. This ensures a sealed top that keeps the inside deliciously creamy while providing a satisfying chocolate shell that snaps beautifully when bitten into. The sprinkle of sea salt at the end not only enhances the flavors but also adds a nice contrast in texture, giving your homemade treat that gourmet touch.
Ingredients
Gather these simple ingredients to get started on your homemade Reese’s Cups.
Ingredients
- 1 cup creamy peanut butter
- 1 cup powdered sugar
- 1 ½ cups milk chocolate chips
- ½ cup semisweet chocolate chips
- Sea salt for garnish
These ingredients will yield delicious cups that are sure to impress!
Instructions
Follow these simple steps to create your Homemade Reese’s Cups.
Prepare the Peanut Butter Mixture
In a medium bowl, combine the creamy peanut butter and powdered sugar. Mix until smooth and set aside.
Melt the Chocolate
In a microwave-safe bowl, melt the milk and semisweet chocolate chips in 30-second intervals, stirring in between, until fully melted and smooth.
Assemble the Cups
Line a muffin tin with cupcake liners. Pour a thin layer of melted chocolate into the bottom of each liner, using about 1 tablespoon. Allow to set for 5 minutes.
Add the Filling
Once set, add a tablespoon of the peanut butter mixture into each cup, then top with the remaining melted chocolate.
Garnish and Chill
Sprinkle a little sea salt on top of each cup, then put the muffin tin in the fridge to set for at least 15 minutes.
After chilling, your homemade Reese’s Cups are ready to enjoy!
Pro Tips
- For a fun twist, try adding crushed nuts or a drizzle of caramel on top before the chocolate sets.
Make-Ahead and Storage Tips
These Reese's Cups can be made ahead of time and stored for later enjoyment. After they've chilled and set, transfer the cups to an airtight container. They can stay fresh in the refrigerator for up to two weeks, although I find they rarely last that long! For longer storage, consider freezing them. Just place layers of parchment paper between the cups to avoid sticking and store them in a freezer-safe container. They can be enjoyed straight from the freezer for a deliciously chilled treat.
If you're making these for a party or gathering, consider preparing multiple batches and varying the toppings. Swapping out sea salt for crushed pretzels or toffee bits can create different flavor profiles while maintaining the same delightful creaminess from the peanut butter. This variation not only offers something for everyone but also keeps your homemade dessert spread exciting.
Dietary Adjustments and Substitutions
This recipe is easily adaptable for various dietary preferences. If you're looking for a vegan version, substitute the chocolate chips with dairy-free chocolate options and the peanut butter with a nut-free alternative like sunflower seed butter to accommodate nut allergies. Additionally, you can opt for a sugar alternative like erythritol or coconut sugar to make it low-sugar or keto-friendly, just be mindful that the texture may change slightly depending on the sweetener used.
For those with gluten sensitivities, rejoice! The ingredients used in this recipe are naturally gluten-free, making it a safe treat for anyone avoiding gluten. Always double-check the labels on your chocolate chips and powdered sugar to ensure they haven't been processed in facilities that handle gluten-containing ingredients.
Questions About Recipes
→ Can I use dark chocolate instead?
Absolutely! Dark chocolate adds a rich flavor that pairs wonderfully with peanut butter.
→ How long do they last in the fridge?
They can last for up to two weeks in an airtight container in the fridge.
→ Can I use crunchy peanut butter?
Yes, crunchy peanut butter provides a nice texture, so feel free to use it if you prefer!
→ Is there a way to make these vegan?
Yes! Use dairy-free chocolate and any nut butter of your choice to make them vegan.
Homemade Reese’s Cups with Sea Salt
Created by: Elowen Carter
Recipe Type: Simple Baking Recipes
Skill Level: Easy
Final Quantity: 12 cups
What You'll Need
Ingredients
- 1 cup creamy peanut butter
- 1 cup powdered sugar
- 1 ½ cups milk chocolate chips
- ½ cup semisweet chocolate chips
- Sea salt for garnish
How-To Steps
In a medium bowl, combine the creamy peanut butter and powdered sugar. Mix until smooth and set aside.
In a microwave-safe bowl, melt the milk and semisweet chocolate chips in 30-second intervals, stirring in between, until fully melted and smooth.
Line a muffin tin with cupcake liners. Pour a thin layer of melted chocolate into the bottom of each liner, using about 1 tablespoon. Allow to set for 5 minutes.
Once set, add a tablespoon of the peanut butter mixture into each cup, then top with the remaining melted chocolate.
Sprinkle a little sea salt on top of each cup, then put the muffin tin in the fridge to set for at least 15 minutes.
Extra Tips
- For a fun twist, try adding crushed nuts or a drizzle of caramel on top before the chocolate sets.
Nutritional Breakdown (Per Serving)
- Calories: 150 kcal
- Total Fat: 9g
- Saturated Fat: 3g
- Cholesterol: 0mg
- Sodium: 50mg
- Total Carbohydrates: 16g
- Dietary Fiber: 1g
- Sugars: 11g
- Protein: 3g