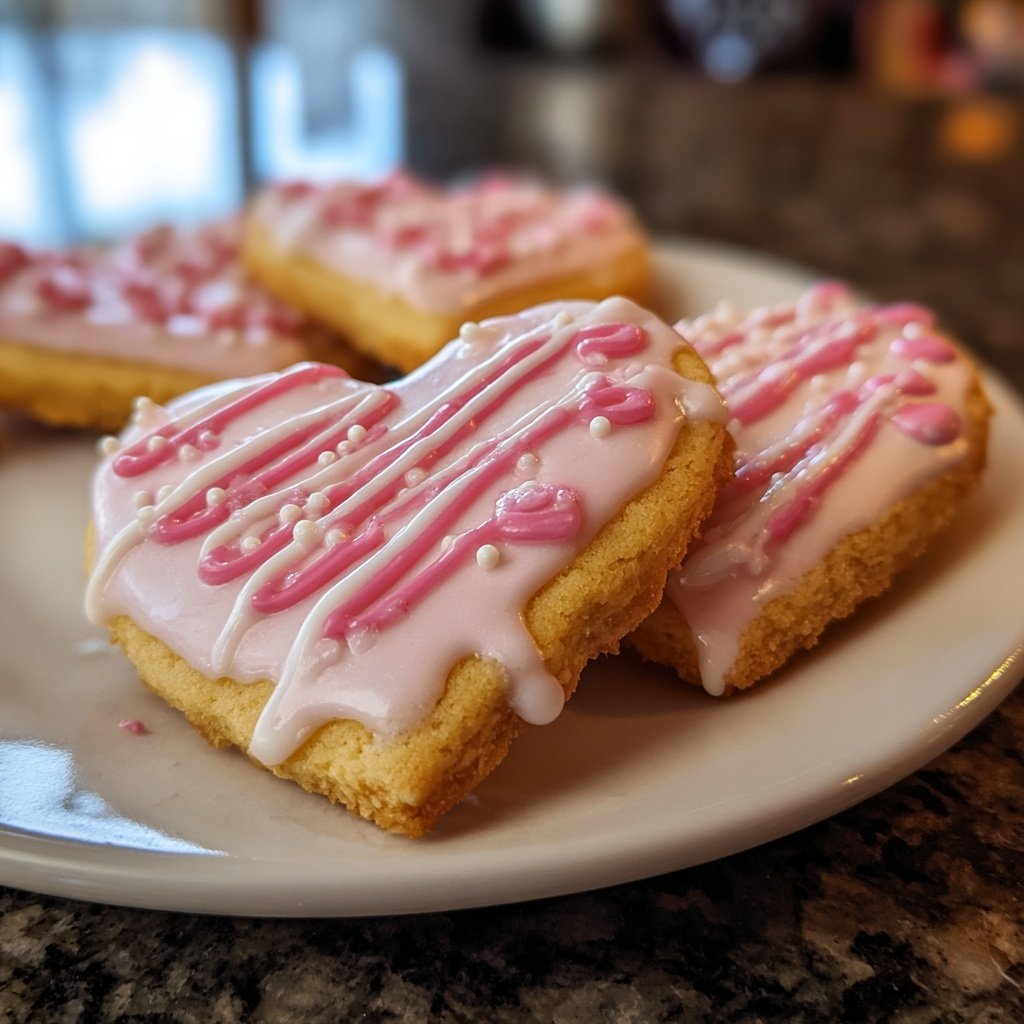
Valentine Butter Cookies with Icing
Highlighted under: Simple Baking Recipes
I adore making Valentine’s Day special with homemade treats, and these Valentine Butter Cookies with Icing are my favorite go-to. The buttery, melt-in-your-mouth cookies paired with a sweet icing make them irresistible. Plus, I love how simple they are to prepare! Each cookie can be dressed up with festive designs, making them perfect for gifting or sharing with loved ones. I can't wait for you to try this delightful recipe and spread some love this Valentine’s Day!
When I first decided to make these cookies, I wanted something that would not only taste great but also look beautiful. After a few tries, I discovered that using a combination of all-purpose flour and cornstarch gives the cookies their lovely texture. The challenge was getting the icing just right—too thick, and it wouldn’t spread, too thin, and it wouldn’t hold its shape. I found that letting the icing rest for a few minutes before applying creates the perfect consistency.
Another thing I’ve learned is that allowing the cookies to cool completely before icing is essential. If they are even a little warm, the icing will melt and lose its shape. Trust me, taking that extra time to ensure everything is at the right temperature will yield gorgeous, festive cookies that everyone will admire!
Why You'll Love These Cookies
- Rich buttery flavor that melts in your mouth.
- Versatile icing that you can color and decorate for any occasion.
- Perfectly sweet, they make a great gift for loved ones.
The Importance of Dough Consistency
Achieving the right consistency for your cookie dough is crucial for the perfect texture. When creaming butter and powdered sugar, aim for a light, fluffy mixture—this incorporates air, contributing to a tender cookie. If your dough feels too sticky after adding dry ingredients, slightly chill it in the refrigerator for about 30 minutes before shaping. This will make it easier to handle and help the cookies maintain their shape during baking.
It's essential to mix the ingredients just until combined. Overmixing can lead to a tough cookie rather than the desired buttery softness. When folding in the flour mixture, use a spatula and gently fold until you no longer see dry flour. The final dough should be soft yet firm enough to hold its shape when rolled into balls.
Decorating with Icing: Tips and Tricks
When preparing your icing, consistency is key. For detailed designs or piping, your icing should be thick enough to hold its shape but thin enough to flow smoothly from a piping bag. If it’s too thick, add a teaspoon of milk gradually until you reach the desired texture. If it’s too thin, incorporate a bit more powdered sugar to thicken it. I often test the icing by lifting a spoon: it should fall in a ribbon that holds its shape slightly before blending back into the bowl.
Get creative with colors by using gel food colorings, which won’t alter the icing's consistency as much as liquid colors. Start with tiny amounts, mixing thoroughly to achieve your desired shade. To achieve a multicolored effect on your cookies, use piping bags filled with different icing, and experiment with techniques like flooding, where a more liquid icing fills in the outlines of your designs. Allow each layer to dry before adding new colors to prevent them from running together.
Ingredients
Gather the following ingredients to make these delightful cookies:
Ingredients for Cookies
- 2 cups all-purpose flour
- 1/2 cup cornstarch
- 1 cup unsalted butter, softened
- 3/4 cup powdered sugar
- 1 egg yolk
- 1 teaspoon vanilla extract
- 1/2 teaspoon salt
Ingredients for Icing
- 2 cups powdered sugar
- 2 tablespoons milk
- 1 teaspoon vanilla extract
- Food coloring (optional)
Make sure to measure the ingredients accurately for the best results!

Instructions
Follow these simple steps to bake your cookies:
Make the Cookie Dough
In a large bowl, cream together the softened butter and powdered sugar until light and fluffy. Add the egg yolk and vanilla extract, mixing until combined. In a separate bowl, whisk together the all-purpose flour, cornstarch, and salt. Gradually add the dry ingredients to the wet mixture, stirring until just combined.
Shape and Bake
Preheat your oven to 350°F (175°C). Roll the dough into small balls (about 1 inch) and place them on a lined baking sheet, spacing them about 2 inches apart. Flatten each ball slightly with the bottom of a glass. Bake for 10-12 minutes until the edges are lightly golden. Allow the cookies to cool completely on a wire rack.
Prepare the Icing
In a mixing bowl, whisk together the powdered sugar, milk, and vanilla extract until smooth. If you’re using food coloring, divide the icing into small bowls and mix in the desired colors. Let the icing sit for a few minutes until it thickens slightly.
Decorate
Once the cookies are cool, use a spoon or piping bag to decorate them with icing. Get creative with your designs, whether it’s stripes, hearts, or even writing sweet messages. Allow the icing to dry thoroughly before storing.
These cookies can be stored in an airtight container for up to a week!
Pro Tips
- For a fun twist, add some citrus zest to the dough for extra flavor, or experiment with different icing colors and designs to personalize them for any event.
Storage and Make-Ahead Tips
These Valentine Butter Cookies can be made a few days in advance. After cooling completely, store them in an airtight container at room temperature for up to a week. If you want to preserve their freshness for longer, consider freezing them. Place the cooled cookies in a single layer on a baking sheet and freeze for about two hours. Once frozen solid, transfer them to a zip-top freezer bag where they can be stored for up to three months.
If you prefer to ice your cookies on the day you plan to serve them, it's best to store the undecorated cookies in an airtight container and the icing separately in the fridge. This prevents the icing from hardening and allows you to create fresh, vibrant designs when ready to serve.
Flavor Variations and Substitutions
There are numerous ways to customize the flavor of these butter cookies. To infuse the dough with a different taste, try adding citrus zest—like lemon or orange—along with the vanilla extract. This brightens the buttery flavor and adds a refreshing twist. For a warmth that complements the butter, consider adding a pinch of cinnamon or nutmeg to the flour mixture.
If you're looking for a dairy-free version, substitute the unsalted butter with a plant-based alternative, such as coconut oil or a vegan butter substitute. Just be mindful that these may alter the texture slightly, so keep an eye on the baking time, as they can spread more than traditional butter cookies.
Questions About Recipes
→ Can I freeze the cookie dough?
Yes, you can freeze the cookie dough for up to 3 months. Just wrap it tightly in plastic wrap and store it in a freezer-safe bag.
→ How long do the iced cookies last?
Iced cookies can last up to a week if stored in an airtight container at room temperature.
→ Can I use margarine instead of butter?
While you can use margarine, butter is recommended for the best flavor and texture.
→ What kind of food coloring works best?
Gel food coloring is the best choice for icing as it provides vibrant colors without thinning the icing too much.
Valentine Butter Cookies with Icing
Created by: Elowen Carter
Recipe Type: Simple Baking Recipes
Skill Level: Beginner
Final Quantity: 24 cookies
What You'll Need
Ingredients for Cookies
- 2 cups all-purpose flour
- 1/2 cup cornstarch
- 1 cup unsalted butter, softened
- 3/4 cup powdered sugar
- 1 egg yolk
- 1 teaspoon vanilla extract
- 1/2 teaspoon salt
Ingredients for Icing
- 2 cups powdered sugar
- 2 tablespoons milk
- 1 teaspoon vanilla extract
- Food coloring (optional)
How-To Steps
In a large bowl, cream together the softened butter and powdered sugar until light and fluffy. Add the egg yolk and vanilla extract, mixing until combined. In a separate bowl, whisk together the all-purpose flour, cornstarch, and salt. Gradually add the dry ingredients to the wet mixture, stirring until just combined.
Preheat your oven to 350°F (175°C). Roll the dough into small balls (about 1 inch) and place them on a lined baking sheet, spacing them about 2 inches apart. Flatten each ball slightly with the bottom of a glass. Bake for 10-12 minutes until the edges are lightly golden. Allow the cookies to cool completely on a wire rack.
In a mixing bowl, whisk together the powdered sugar, milk, and vanilla extract until smooth. If you’re using food coloring, divide the icing into small bowls and mix in the desired colors. Let the icing sit for a few minutes until it thickens slightly.
Once the cookies are cool, use a spoon or piping bag to decorate them with icing. Get creative with your designs, whether it’s stripes, hearts, or even writing sweet messages. Allow the icing to dry thoroughly before storing.
Extra Tips
- For a fun twist, add some citrus zest to the dough for extra flavor, or experiment with different icing colors and designs to personalize them for any event.
Nutritional Breakdown (Per Serving)
- Calories: 150 kcal
- Total Fat: 7g
- Saturated Fat: 4g
- Cholesterol: 20mg
- Sodium: 50mg
- Total Carbohydrates: 18g
- Dietary Fiber: 0g
- Sugars: 10g
- Protein: 1g